Apple has long preached the gospel of minimalist design, and that's been a clever business strategy. But it's one that other companies would be foolish to follow closely.
The cleverest trick that Apple has ever pulled isn’t convincing us to pay $500 for a phone or MP3 player, but rather convincing the world that if you want good design, then you have to follow Apple’s template of clean lines and stripped-down details. You can see how that happened: The company has become so synonymous with both good design and minimalism that most people assume those two things are one and the same. They’re not: You can have good design that’s fanciful and wacky; likewise, you can have minimalist design that’s horrible.
The fact is, minimalism has been a business strategy for Apple--and maybe their most successful business strategy of all. While just-in-time manufacturing and a stand-alone retailing have earned it hundreds of billions in sales, minimalism built the brand that made their gadgets lust-worthy to begin with. Let’s dissect how that works.
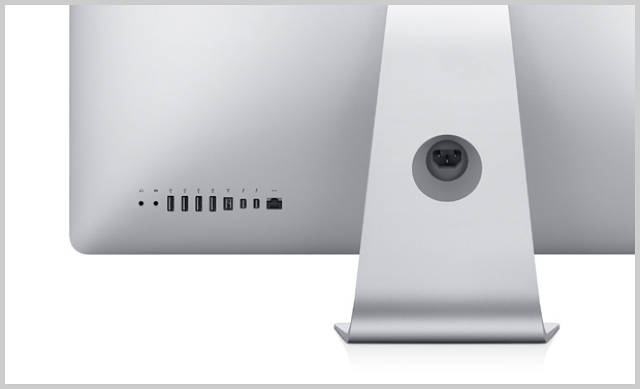
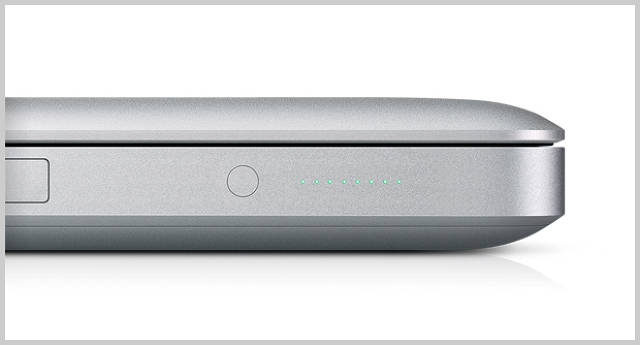
One of the best features of Apple’s gadgets hides in plain sight: Each one looks closely related to the others. The Apple TV interface isn’t too far different from that of iTunes; iTunes itself borrows the basic feel of the Apple OS. Meanwhile, the gadgets themselves take up that same sort of family feel: The iMac, MacBook Pro, MacBook Air, and iPhone are all radically different devices but they’re immediately recognizable as cousins thanks to their shared detailing and material palette.
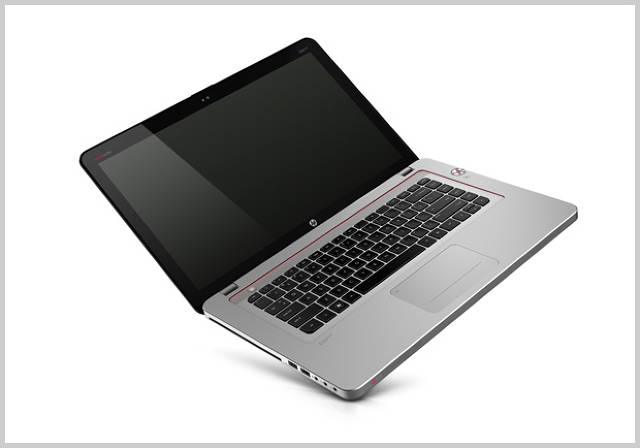
To appreciate how unique that is, simply look at some of their competitors. While Microsoft’s new mobile OS is remarkably well designed, its design language has no relationship to the xBox UI, or the Windows OS. Not only do HP, Dell, Lenovo, and Samsung make boring black boxes, but every single black box they make seems to have no relationship with the others. As Apple has proved, that’s a massive missed opportunity. Each one of Apple’s gadgets quietly sells the others, every single day you have it. When you buy an iPhone, you’re buying into the Apple design language, and the little details you come to appreciate are details you know you’ll find in all their other products--from the laser-etched buttons to the stunningly beautiful screws to the dead-simple UI layout. When you finally decide to buy another Apple gadget--say, an iPad or a MacBook Air--you’ve already been primed to love it.
It would extremely hard to pull that off without a minimalist design language. The wilder your detailing and form-factor are, the harder they are to translate to totally different products. Not so with a minimalist palette--in that case, simply lifting a few, select details such as an aluminum case or a particular rounded corner, is enough to suggest a strong, familial relationship.
Brands are only as good as their last redesign: Almost every industry, from cars to computers to clothing, is littered with some cautionary tale about a run-away success that was replaced with a disaster. The goodwill that a company can build with a remarkably designed product can disappear overnight, if its successors don’t live up to expectations. Over time, and with greater and greater successes, the inherent risk that you carry with a redesign only grows.
Thus, it’s no surprise that Apple’s own designs have grown more and more conservative over time as the company has evolved from a nearly dead also-ran into the world’s most valuable company. Take the iMac. The original design announced the company’s overhaul, and its boldness was a response to the enormous challenges that the company faced in 1997. The "sunflower" design that followed that was no less radical, with its swiveling flat-panel monitor. But since then, the iMac’s evolution has slowed. Today, it’s own design language moves in lock-step with Apple’s broader design language. Much of the same thing has happend with the iPod: The original, all-white design language has given way to a larger and larger screen--which means that the canvas for the rest of the design has grown successively smaller, so that these days, when you see a new design for the iPhone or the iPad, the redesigns are remarkable in how little actually changes.
The point is, by reducing the design language to such relatively small gestures--the curve of an edge or the etching on a button--Apple has reduced the risk associated with rolling out new products.
The growing screens and shrinking cases of our gadgets today mean that there’s actually very little to design in today’s products. I don’t mean that it’s easier to design these gadgets, but rather that the sheer footprint of the physical design has shrunk. Today’s CE designs aren’t much more than a glorified frame for a big black screen, and so the range of possible design gestures has become vanishingly thin.
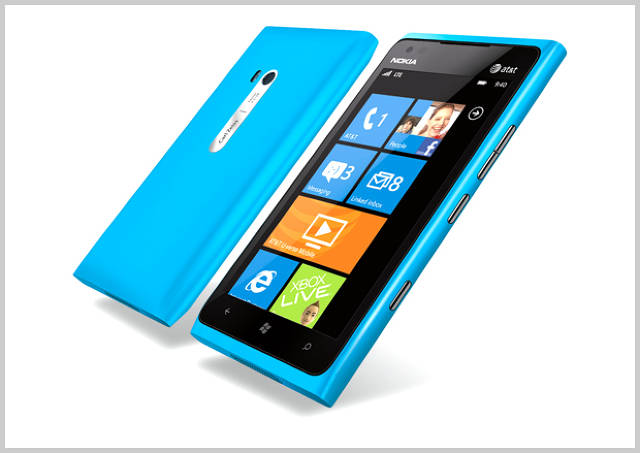
All of that plays directly into Apple’s hands, because it becomes harder and harder for other companies to distinguish themselves with less and less real estate open for redesign. If you’re simply designing a minimalist case for a laptop, and that laptop barely has more to it than a keyboard and a screen, then by default, almost anything you do is going to look like a copy of an Apple product. Phones are another good example: The actual case almost comes to nothing on today’s biggest phones. So even though the Nokia Lumia 900, for example, is a remarkable bit of industrial design, it’s impossible to imagine it as a breakout hit when its form factor is such a small part of its overall experience.
The Nokia Lumia 900: Well designed, but unlikely to break out.
Everything I’ve laid out above might seem like unalloyed praise for Apple. But that’s not my aim at all. I’m merely trying to point out that Apple’s minimalism isn’t just about aesthetics; rather, it’s a massively important piece of their overall business strategy. And as a result of their success, Apple has inseparable from most people’s definition of what "good design" means.
Is that a good thing? It’s not uncommon to hear people claim that Apple has singlehandedly improved the standard of design across myriad industries, simply by showing the massive profits that can result from better-designed products. That’s probably true. But I also believe that Apple might have reached a point where the company is actually bad for design, because their own example is limiting people’s imagination for what good design can truly be.
For one, it’s become almost impossible for anyone to design anything that isn’t in some way a response to Apple. Sometimes that’s good. For example Lytro, a start-up camera company, designed their product with the founding ideal of a dead-simple UI. That emphasis on simple, intuitive interactions is a legacy of Apple’s approach that should be followed forever. But more often than not, companies hoping to emulate the company’s success don’t realize that they simply can’t win by mirroring its current design strategy. They forget that before Apple became the world’s most valuable company, it bet the farm on the wildly weird iMac design.
But the broader problem with all this Apple adoration is that Apple isn’t dreaming nearly as big as it used to when it comes to design. I can think of one particularly huge gap in their imagination: The linkage between the pixels and the physical world. The design language you see on your iPad screen has very little to do with the physical design of the computer itself. While the case lives in a world of clean minimalism, the UI is filled with fussy, ridiculous details, such as the wood-paneled iBook store or the very iconography itself, which is beginning to feel dated and static. By contrast, I can see a day where the physical products are entwined with the beauty of the pixels inside--when every last physical detail evokes those within the UI, and vice versa.
It probably won’t happen soon, but eventually Apple will have to become an example not only of how you do things, but how much is left to be done. I’m eagerly waiting for it to happen.
Google Drive was officially launched this morning, complete with an Android app to help you manage your Drive. Take a quick look at the official Google Drive app to see how it works.
You may have noticed shortly after the official announcement of Google Drive that Google Docs was no longer on your Android device. Instead, you can find the Google Drive app in its place. If for some reason your Google Docs app hasn't made the switch yet, you can download the Google Drive update to your device from Google Play. Let's take a look at how the Android app integrates and works with Google Drive.
(Credit: Screenshot by Jason Cipriani/CNET)
The main screen of Google Drive provides a few options for navigating the new service. You will have quick access to files in your Drive, any documents that have been shared with you, any files or folders you have starred, recently opened, or edited, as well as any files you have downloaded for offline access.
The account name (blurred out in the screenshot) at the top of the screen acts just like it does in all other Google apps; tapping on it will allow you to quickly switch between Google accounts and the respective Drive accounts.
(Credit: Screenshot by Jason Cipriani/CNET)
To create a new item on your Drive, tap on the menu icon then select New. You will then be given the option of creating a document, spreadsheet, document from photo, or to upload a file. If you used Google Docs on your device previously, you should be familiar with the first three options. Upload, however, is new and specific to Google Drive.
When you select upload, you're able to browse and upload files stored on your Android device to your Drive account. One important thing to note, however, is that installing a file manager, such as Astro File Manager, is required to browse files outside of your music and photo galleries.
Keep in mind if you want to place the new item in a specific folder, you will need to navigate to that folder in the app before you upload or create it. If you create a new item from the home screen, it will be placed in the root directory of your Drive.
(Credit: Screenshot by Jason Cipriani/CNET)
The settings for the Google Drive app allow you to set the amount of data you will want the app to cache, starting at 50MB topping out at 250MB. You can also enable/disable encryption of offline documents as well as enable a reminder to be displayed when you are updating files over a wireless connection, not Wi-Fi.
(Credit: Screenshot by Jason Cipriani/CNET)
When viewing your folders and files, you can favorite any item by tapping on the star located next to the item name. If you tap on the arrow icon located on the right-hand side of the listing, you are presented with a list of options.
These options allow you to save the file for offline viewing, sharing, sending, renaming, deleting, and opening with another app.
You can share, rename, and delete entire folders, but you cannot make them available for offline viewing or send them.
At anytime in the app you can tap on the familiar search icon and search for a specific document or folder. The items stored in your Drive aren't automatically updated in the Android app. So, if you have recently placed new items on your Drive and they aren't yet appearing in the Android app, tap on the menu icon and select refresh.
If you have any extra tips or tricks we missed for Google Drive on Android, please share them below in the comments.
For some reason it's a common belief that Android devices and Macs just don't get along. This misconception may have been true back in Android's infancy, but nowadays there's a long list of methods, apps, and services that let you use your Android device with your Mac. It's impossible to cover every app and service available, but I'm going to share the best of the bunch.
Most of the services listed below rely on the cloud to make the process of moving data between devices painless, while other methods require the tried and true method of data transfer through a USB connection.
(Credit: Screenshot by Jason Cipriani/CNET)
Syncing documents
Unlike with the iPhone, transferring files is as easy as dragging and dropping. The way you do this, however, will depend on what version of Android your phone runs. Not only can you sync documents on your Android device, but your phone can also act as a jump drive, storing vital documents for you or helping move files around among computers.
Older Android devices have a USB Storage Mode that can be activated by plugging your device into your Mac, pulling down the notification shade, and tapping on the USB notification. From there, select "Turn on USB Storage."
At this point, your Android phone will appear as a drive on your desktop. Open it, and you'll be able to move files to and from your phone's various folders.
When using this method, make sure you unmount your Android device before disconnecting it from your Mac. To do this, open Finder and click on the Eject icon next to your device. Not ejecting, or unmounting, your device before disconnecting can corrupt the storage on your device, which results in lost files.
Newer Androids require you to use an app to sync files between your two devices. Google recommends you use its Android File Transfer (AFT) program, which you can download at Android.com/filetransfer. With AFT you can browse the folders system of your Android device and drag and drop files between it and your Mac. The program is very basic, but it works.
While AFT is more than sufficient for basic file syncing, other apps such as Droid NAS make it possible to wirelessly share files between your device and your Mac with ease. The program works by effectively making your phone or tablet appear as a shared computer in your Mac Finder, allowing you to transfer files without ever reaching for a USB cable. Read through Ed Rhee's guide to Droid NAS to see how you can set up syncing profiles based on Wi-Fi networks. I've been using this app and love it.
Another way to wirelessly access files and other content on your Android device is to use AirDroid, a free service that lets you remotely access and modify your phone's files from a browser window. AirDroid 2 is currently in an open beta and will allow you to manage a long list of items on your device wirelessly. Or you can install the original version of AirDroid, should you not want to mess with a beta.
Music
There are a number of scenarios that will determine how you sync music files on your computer with your Android device. As you know by now, you could just drag and drop your entire music library on to your phone, but you'll run into a couple of issues. First, you don't want to have to do this each time you download a new song. Second, you might not have enough room on your device to store all those files.
Luckily, Google Music solves these problems and makes the process of syncing music easy. With Google Music, you're able to upload your entire music library (up to 20,000 songs) and stream or download to your phone so long as you have an Internet connection. And, each time you download a new song on your Mac, it'll become available on your phone.
To get started with Google Music, you'll first need to download the Music Manager app.
After downloading the app on your Mac, you'll need to show it where your music is stored. Once you've given it a folder to monitor, the app will automatically upload your music to Google's Music service. Not only does this method provide a simple way of getting your music to your device, but it also frees up storage space that would otherwise be taken up by music.
(Credit: Screenshot by Jason Cipriani/CNET)
Once you've set up your library, you can download any artist, album, or playlist via Wi-Fi or cellular connection within the Android Music app itself. Just tap on the pushpin icon to start the download process.
Best of all, you won't have to fuss with iTunes when syncing music between your Mac and your Android device. You simply tell the Music Manager where your music library is; when new files are added, they're automatically uploaded for you. You can store 20,000 songs for free.
Photos
There are a few different ways to sync photos between your Android device and your Mac so that each time you take a photo, it's backed up to your Mac. The beauty of some of these approaches is that -- beyond initial setup -- you don't have to do anything else to get the photos from your phone to your Mac. Not only does this type of system allow you to easily access photos on your computer, but it also ensures that you constantly have a backup of your photos should you lose your phone. Before you continue, sign up for a Dropbox account if you don't already have one. Dropbox provides a free way for your photos to automatically sync via its service, which downloads them to a Camera Uploads folder on your Mac. This is the quickest way to get photos from your device to your Mac, but not the only way. SyncMate Expert will also help you achieve the same results, as will the AFT and Droid NAS apps, albeit not automatically as Dropbox does.
There's also another app called DoubleTwist, which has an AirSync add-on feature. The app requires you to install software on both your Android device and your Mac. Once installed and set up, you can sync your music, photos, and videos wirelessly between the two devices.
Movies
The larger screens commonly found on Android devices make them ideal for watching movies. But you don't only have to rely on Netflix, Hulu Plus, or HBO Go for your entertainment; you can load movies you own on your phone and watch them anywhere, even when you're offline. Transferring movies or large videos between your Mac and Android will be time-consuming, so make sure you're not doing this when you're rushing to make a flight.
Solutions like AirDroid, DoubleTwist, SyncMate, Droid NAS, and AFT will all allow you to transfer movies and videos to your Android device from your Mac. But, do keep in mind that some of the wireless services may be slower than the wired approach the Android File Transfer app offers.
No matter which method you choose, you'll need to add any movie files to the Movie folder located on your Android device. If the folder isn't already present, go ahead and create it.
Where you're likely to run into problems is with playing the various video file types on your Android device, as the stock video player only supports so many formats. But if you'd rather not worry about that, download MX Player from the Play store and use it as your primary video player. It supports a long list of file types.
Of course, all this video-transferring will quickly hog precious storage space, so consider incorporating a cloud solution. One option is to stream videos stored in your Dropbox account through the Dropbox app. Just keep in mind that streaming videos over a cellular connection will eat into your data plan.
Contacts and calendars
Many of us would be completely lost if we were to lose the contacts in our address book. Long gone are the days of memorizing phone numbers, addresses, and birthdays; now we rely on our devices to store this vital information for us. Also long gone are the days of needing a USB connection to sync this type of information between devices; now service providers such as Google and Apple ensure that all of our devices are up-to-date with important information once it's added to an account.
(Credit: Screenshot by Jason Cipriani/CNET)
The good news is that Google and Apple really do play nicely together when it comes to syncing your contacts and calendars. On your Mac, sign in to your Google account in both the Contacts and Calendar apps. You can do this by launching either app and navigating to the Preferences (from the menu bar, click on the app name, then click on "Preferences"). Once you can see the Preferences page, click on the Accounts icon at the top. In the Contacts app, click on "On My Mac" and then check the box to begin synchronizing with Google. You'll need to sign in to the same Google account you used on your Android device.
The process in the Calendars app is similar, but instead of selecting On My Mac, you'll need to click on the "+" sign at the bottom of the window and then select Google from the list of services you can add. Again, log in with the same Google account as you did on your Android device.
On your Android device, launch the Settings app and view your Google account under the Accounts section. Tap on your account name and make sure the check box next to Calendar and Contacts is checked. Any changes made to this information will wirelessly sync between your Android device and Mac on a regular basis. Most of the time the changes are near-instant, but there can be slight delays in syncing.
If you're an iCloud user who would rather not switch over to Google services for your contacts and calendar needs, check out the SmoothSync for Cloud Calendars or Contacts apps. Either of these apps will allow you to sync your iCloud information with your Android device.
Browser bookmarks and tabs
Syncing your browser's bookmarks and tabs is one of those features that once you start using it, you don't understand how you ever lived without. It allows you to seamlessly switch from your Mac to your smartphone (or vice versa) and continue browsing where you left off. Instead of e-mailing or messaging yourself a link, you simply launch your browser and everything will be waiting for you.
The easiest way to ensure that your bookmarks, open tabs, and other browser preferences sync between your Mac and your Android device is to use Google's own browser, Chrome.
If your Android device doesn't come with Chrome preinstalled, you can download it for free here. And of course you'll need Chrome for Mac, which can be downloaded here.
Log in to Chrome on both devices with the same Google account and then view the Settings page. Check the box next to the services you'd like to sync.
Note that you'll need to be using an Android device running Android 4.0 and above to install Chrome. If you happen to be running an older version of Android, you can try using SyncMate. The free version doesn't provide bookmark syncing, so you'll be looking at paying $35 for the Expert version.
Obviously we can't cover every app or service when it comes to using an Android device with a Mac, so if you have one you're fond of, please mention it in the comments. And if we left any categories out, please let us know so we can go back and add it.
OS X Mavericks is now available to everyone as a free download, and while you can update as many Macs as you want by downloading the installer repeatedly from the Mac App Store, a better option for many is to create a simple bootable USB install drive. We covered this some time ago using a fairly technical process, but Apple must have realized that method was overly complex for many users and has included a much simpler method to create OS X Mavericks install media. Users will still need to turn to the Terminal to finish the job, but this time around only a single command needs to be executed, making it much easier and faster than the manual approach. We will show you exactly how to create a Mavericks boot installer in four simple steps, even if you have no experience with the command line you’ll be able to do it.
Requirements for this are basic, you will need the free OS X Mavericks installer on a Mac, and an 8GB external drive or greater that you don’t mind being formatted. External hard drives work, as do USB flash drive volumes, and Thunderbolt disks.
Yes, you can easily re-download Mavericks even if you have already installed it. If you’re using this guide for a re-downloaded version of Mavericks simply jump straight to step #3.
2: Stop When You See This Screen
When Mavericks is done downloading you will see the screen below to begin the installation – stop – and do not continue yet if you want to make a USB install drive.
3: Connect the External Drive
Now is the time to connect the external drive or USB flash disk to the Mac that you want to convert into the installer, so plug it in. Remember, this external drive will be formatted to turn into the Mavericks bootable installation volume, so don’t use an external drive that has important data or documents on it.
4: Launch Terminal to Make the Mavericks Install Media
The Terminal app is found within /Applications/Utilities/ or you can launch it from Spotlight. Once at the command line, you will need to enter the following command:
Be sure the entire command string is on a single line. You will need to replace “Untitled” in the volume path with the name of your external drive that you want to turn into the installer disk, this should match the name of the external USB flash drive exactly. The Terminal will wrap text so it may look something like this:
Because the command uses sudo you will need to enter the Macs administrator password to continue the process, note that when typing admin passwords into the command line using sudo or su the password text will not display and it will appear as if nothing is being typed, that is a security feature, just type the password as usual and hit return.
Once executed you will see a progress indicator in the Terminal that looks like the following, the entire creation process is automated but can take some time so it’s best to leave alone for a while until you see the final “Done” text.
Erasing Disk: 0%... 10%... 20%... 30%...100%...

Copying installer files to disk...


Copy complete.

Making disk bootable...


Copying boot files...

Copy complete.

Done.
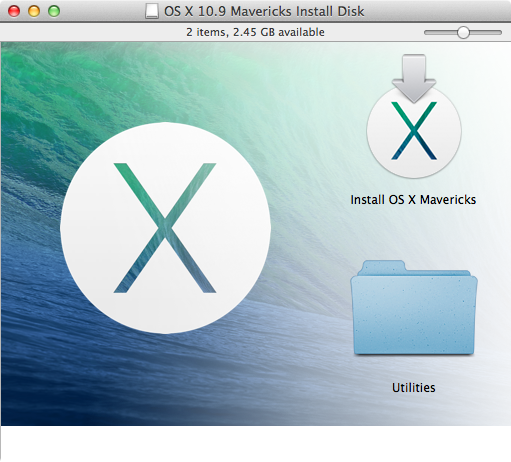
Exit out of Terminal and return to the Finder if you want to confirm the OS X Mavericks installation drive was created. You will see it in the Finder (or desktop) labeled as “Install OS X Mavericks” and the volume contains a single installer app.
You can now choose to install Mavericks with the original installer that you stopped at in the first step, or use the installation volume you just created.
For what it’s worth, the original USB creation method continues to work, but this new approach is much faster and generally more user friendly, making it the preferred choice for just about everyone.
This drive is a standard OS X installer but it’s also bootable, meaning it can be used for upgrading from prior versions of Mac OS X (Mavericks 10.9 supports direct upgrades from Mac OS X Snow Leopard 10.6, Lion 10.7, or Mountain Lion 10.8), or to perform entirely fresh installations. Regardless of the Mac being installed on, it’s a good idea to prepare the Mac for the 10.9 upgrade by cleaning it up a bit and backing up the data.
Booting from the Mavericks Install Drive
Booting a Mac from the freshly created Mavericks install drive is easy:
Connect the Mavericks installer drive and reboot the Mac
Hold down the Option key during boot to bring up the startup disk menu
Select the Install OS X Mavericks media to boot from the installer volume, if it’s a USB drive it will have an orange icon
This will boot directly into the Mavericks installer where you can upgrade or reinstall OS X. The install is almost entirely automated once you select the volume, and the total installation time is usually about 35 minutes to 1 hour, though it may take longer depending on the Mac model.
Thanks to @Nor Eddine Bahha who originally posted the createinstallmedia command string on our Facebook page, and thanks to everyone else who sent this great trick in through email, Google+, and Twitter as well. Enjoy Mavericks!
If you don't want to use Diskmaker X for some reason, poster tywebb13 on the MacRumors forums has your hookup. Assuming that you have the OS X Mavericks installer in your Applications folder, and you have a Mac OS X Extended (Journaled)-formatted volume named "Untitled" mounted on the system, you can create a Mavericks install drive by typing the following command into the Terminal. sudo /Applications/Install\ OS\ X\ Mavericks.app/Contents/Resources/createinstallmedia --volume /Volumes/Untitled --applicationpath /Applications/Install\ OS\ X\ Mavericks.app --nointeraction
The command will erase the disk and copy the install files over. Give it some time, and your volume will soon be loaded up with not just the OS X installer, but also an external recovery partition that may come in handy if your hard drive dies and you're away from an Internet connection.
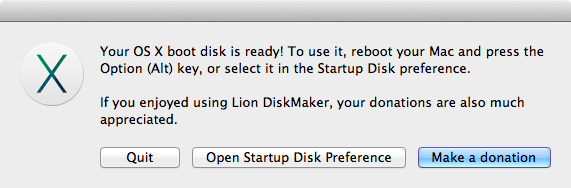
Whichever method you use, you should be able to boot from your new USB drive either by changing the default Startup Disk in System Preferences or by holding down the Option key at boot and selecting the drive. Once booted, you'll be able to install or upgrade Mavericks as you normally would.
Update: This article originally contained instructions for using Lion Diskmaker 3 beta 3. It has been updated for the release of Diskmaker X, the non-beta version of the same program.
When Apple released OS X 10.7 two years ago, it stopped selling operating system DVDs in its stores, stopped shipping recovery disks with new Macs, and switched to downloadable installers for OS X upgrades. These download-only installers have actually worked pretty well—I’ve never had an issue downloading the software from the Mac App Store or restoring a Mac using the Internet Recovery feature when something went south. That said, it’s still nice to have an install disk handy for those cases when you don’t have a connection, when your connection is slow, or when you just have a whole bunch of Macs and don’t want to have to download the installer on each and every one of them.
The good news is, as with Lion and Mountain Lion, it’s possible to create a local USB installer for Mavericks. The bad news is that it wasn’t as simple as it was before—Apple has changed the way the installer works, and making an install disk manually is more difficult than it used to be. Before we get started, here’s what you’ll need:
An 8GB or larger USB flash drive, or an 8GB or larger partition on some other kind of external drive.
The OS X 10.9 Mavericks installer from the Mac App Store in your Applications folder. The installer will delete itself when you install the operating system, but it can be re-downloaded if necessary.
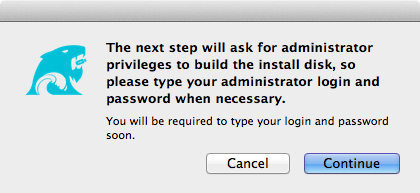
An administrator account on the Mac you're using to create the disk.
The easy way
Enlarge/ Diskmaker X remains the easiest, most user friendly way to get this done.
Andrew Cunningham
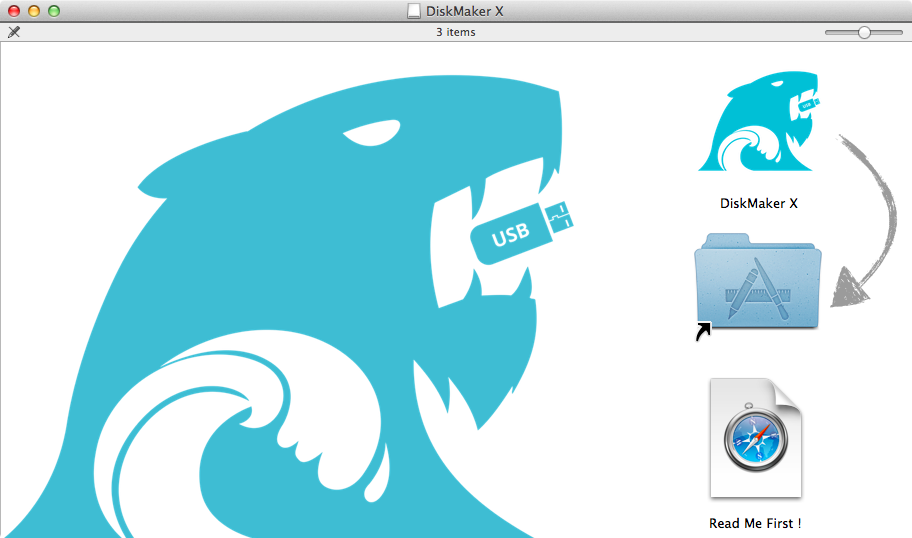
Once you've obtained all of the necessary materials, install the Diskmaker X app to your Applications folder. The app can currently make installers for OS X 10.7, 10.8, and 10.9, but we're only interested in Mavericks today.
Diskmaker X has actually been around since the days of OS X 10.7 (it was previously known as Lion Diskmaker), but it's more important now because Apple has made alterations to the installer that prevent the old Disk Utility method from working. It's still possible to create a disk manually using a Terminal command (which we'll go into momentarily), but Diskmaker X presents an easy GUI-based way to do it that is less intimidating to most people. One note of caution: Diskmaker X no longer supports creating OS X install DVDs. This isn't going to be a problem for any Mac that can actually install Mavericks, but if you'd rather use a disc than a USB drive, you're apparently out of luck.
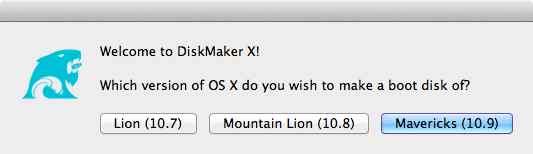
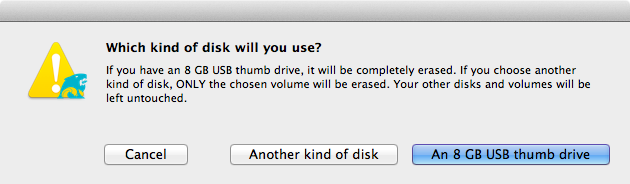
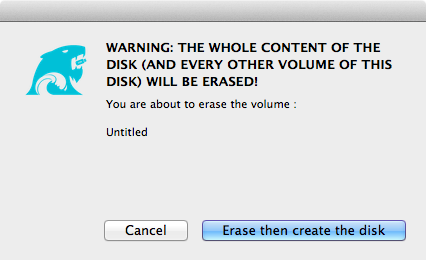
Anyway, select OS X 10.9 in Diskmaker X, and the app should automatically find the copy you've downloaded to your Applications folder, but clicking "Use another copy" will let you browse the drive if you happen to have moved it. It will then ask you where you want to copy the files—click "An 8GB USB thumb drive" if you have a single drive to use, or "Another kind of disk" to use a partition on a larger drive or some other kind of external drive. Choose your disk (or partition) from the list that appears, verify that you'd like to have the disk (or partition) erased, and then wait for the files to copy over. The process is outlined in screenshots below.
The 2011 release of OS X 10.7 Lion seemed to mark the natural endpoint of the "big cat" naming scheme. But Apple couldn't resist the lure of the "cat, modifier cat" naming pattern, releasing OS X 10.8 Mountain Lion a year later. Perhaps it just wanted to give its cat nine lives.
The 10th major release, OS X 10.9 Mavericks, is named after an awkwardly plural California surfing spot, finally ending the feline dynasty. But what part of the operating system's existence is this? The afterlife?
When it comes to OS X, many people are suffering from the end-of-history illusion: the belief that while the Mac platform has consistently experienced significant enhancements in the past, it will somehow not continue to grow and mature in the future.
So let's readjust our perspective. Perhaps the first seven big-cat releases were OS X's early childhood: birth, potty training, learning to walk and talk, and so on, culminating in some form of self-actualization.
With Lion, the Mac entered an awkward adolescence, acquiring a newfound concern about what the other kids were doing. Accordingly, OS X's last two releases included several naked attempts to ape the look and feel of its more successful sibling, iOS.
But that was all before last year's ouster of Scott Forstall, senior vice president of iOS Software. By all accounts, Forstall was one of the driving forces behind the iOS aesthetic that Lion and Mountain Lion so enthusiastically embraced. Jony Ive's iOS 7 strikes off in a bold new direction based on a philosophy that Apple is eager to generalize to the company as a whole—leaving OS X holding the stitched-leather bag.
An OS out to sea
Let's say we accept that this is not the end of history and that OS X will continue to evolve. To what end? Aside from undoing the most egregious peer-pressure-motivated interface changes, what should this first non-cat release of OS X do differently from its predecessors?
One option would be to continue to follow iOS's lead, switching gears from rich textures and simulations of analogous physical products and setting off in pursuit of the new, spare iOS 7 aesthetic. I'll spoil it for you: Apple hasn't chosen this path—not yet, anyway. Time and resource constraints alone could explain this choice. After all, Apple didn't even have the iPad version of iOS 7 ready in time for WWDC this year. An interface overhaul in Mavericks was clearly out of the question.
Mavericks is also not an internals-only release like Snow Leopard, which famously promised "no new features." There are new features in Mavericks, even new bundled applications.
To some degree, the content of any OS release is determined by what did and didn't make the deadline for the previous release. There are exceptions, like Fusion Drive, which didn't quite make it into Mountain Lion but also couldn't wait for the next major OS release because it was a prerequisite for some new hardware products.
Nevertheless, Apple does try to give each new OS some sort of theme. Mavericks is the first California-themed release of OS X, named after "places that inspire us here in California," according to Craig Federighi, who says this naming scheme is intended to last for at least the next 10 years. The pressure is on for Mavericks to set a new direction for the Mac platform.
According to Apple, Mavericks has a dual focus. Its first and most important goal is to extend battery life and improve responsiveness. Secondarily, Mavericks aims to add functionality that will appeal to "power users" (Apple's words), a group that may be feeling neglected after enduring two releases of OS X playing iOS dress-up.
Is that enough for Mavericks to live up to its major-release version number and to kick off the next phase of OS X's life? Let's find out.
The other day, I finally accomplished one of my long-standing goals: to go from one of those “Wouldn’t it be cool…” ideas to a working, live app in less than 1 hour. 45 minutes, actually.
It all started with a design meet-up in San Francisco. I can honestly say this was the best meet-up I’ve ever been to: Even though it was announced only two days in advance, more than 200 people RSVPed, and a good number of them showed up. It was a great chance to put faces to familiar names, as well as to make new friends.
But I got to talking with so many people that I didn’t have a chance to get contact info for everybody. So, the next day, I asked the organizers about it and they suggested that everyone who attended leave a link to their Twitter account in a shared Google Doc.
That would work, but I was afraid it would prove to be too much effort. If I’ve learned one thing in my years as a designer, it’s that people are lazy. Instead, what if I built an app that lets the user add their Twitter account to a list in a single click?
The app would work something like this:
The user signs into Twitter,
A link to their Twitter profile appears on the page,
That’s pretty much it!
With my list of requirements complete, I set to work to see how fast I could build this, and I thought it’d be interesting to walk you through the process.
At first, take a peek at how the final app looked like: Our final bare-bones (but working!) app.
Once the Apple TV is connected to your TV and showing the setup screen, you just unlock the iOS 7 device, making sure that Bluetooth is enabled and you're connected to the Wi-Fi network that you want the Apple TV to be connected to. You then touch the iOS device to the Apple TV, after which prompts appear on both the iOS device and Apple TV.
After entering your Apple ID and password on the iOS device and answering two simple questions, the configuration of the Apple TV takes place. It's connected to your Wi-Fi network, activated, and is set up with your iTunes Store account.
It's a fast and easy way to set up the current Apple TV and hopefully any new devices that may be released by Apple in the future.
UPDATE: Microsoft has made the video private following widespread complaints from viewers. Business Insider managed to download the video before it was pulled and their version is embedded below.
Microsoft has done a lot of Samsung-esque Apple mocking in recent ads that have produced mixed results at best. Microsoft’s latest video depicts a supposed “fly on the wall” at Apple’s Cupertino headquarters as two Apple employees pitch new iPhone ideas to their new superiors. The video does get some legitimate shots in — the line about Apple going out of its way to explain how the iPhone 5c’s plastic casing doesn’t really feel like plastic certainly rings true — but the execution is on the whole rather awkward and lacks the polish of Samsung’s classic Apple-roasting ads. Plus, unlike Samsung, most of Microsoft’s ventures in the mobile world have been duds so far and thus take some of the bite from the company’s attempt at parody. The full video follows below.


 TUAW reader Aaron G pointed out an interesting Apple knowledge base article to us this morning. According to the post,