How to,
Mac OS X - March 22nd, 2010 -
52 Comments
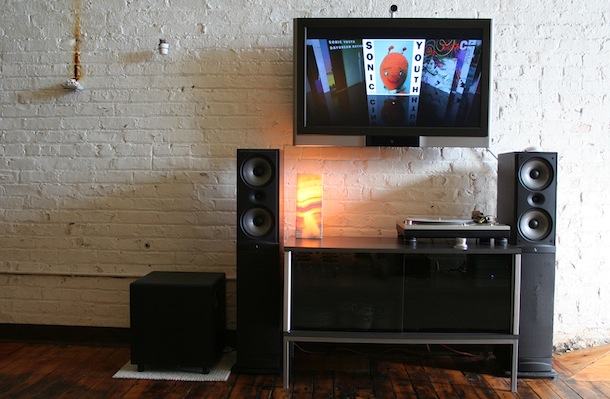
Mac Mini’s make awesome little media centers since they are so small and have more features than an AppleTV. Following the below guide you will be able to do the following with a Mac Mini:
- Watch HD movies, videos, view photos, listen to music, and view weather from your couch on your TV.
- Watch Hulu, YouTube, and any other streaming online video on your TV
- Add & delete torrents to download onto the Mac Mini, remotely
- Control the media center via your iPhone
- Watch the movies stored on your Mac Mini on your iPhone
- Serve websites from your Mini to the world
- Browse the web, play games, and use your Mac Mini on a TV from your couch, wirelessly
Note: If this walkthrough seems a little overkill to you, check out our easy guide to setup a Mac Media Center which will provide a simpler setup, minus some of the features like remote torrent management.
Update: With the release of the new Mac Mini (2010 model), you won’t need any additional video or audio cables and adapters, only an HDMI cable! The new Mac Mini makes a perfect media center and outputs HD content flawlessly, plus it doubles as a great Mac, highly recommended. You can get the new Mac Mini for $669 from Amazon with free shipping
How to setup a Mac Mini as a media center, server, and torrents box
I just did all this and figured someone would benefit. It’s more of a link-list than a how-to; it’s also very dumbed down for anyone who’s not knowledgeable on any of this stuff…
Disclaimer: Do this all at your own risk. This all worked for me and I’m thoroughly enjoying the setup. If you feel there’s a better way to do some of this, feel free to comment!
Purchase a Mac Mini
You can pick up a Mac Mini from the usual suspects: Apple, MacMall (sometimes small discount), Amazon (usually good discount and free shipping), Craigslist, eBay, etc.
Apple Store – $699 with free shipping
MacMall
Amazon – New Mac Mini for $669 with free shipping – BEST DEAL
Don’t forget to check the Apple Refurbished Store for discounted machines, though most of the time there aren’t Mac Minis available.
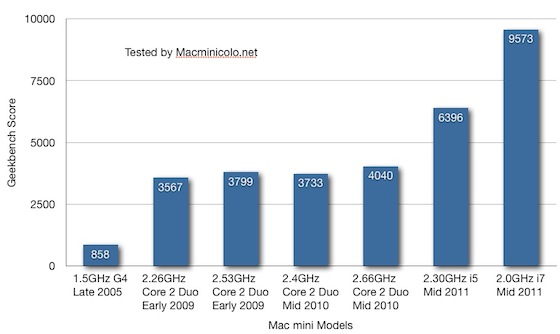
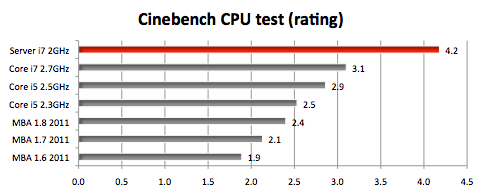
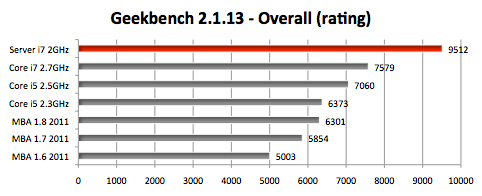
Make sure that whatever Mac Mini you get is capable of playing high definition video if you’d like that capability. Generally speaking the newer the Mini the better (the newest 2010 model is ideal), and an Intel chip with 2GB of RAM is highly preferable.
Get the Media Center Software
Your Mini will just be a Mac hooked up to a TV without the right media center software.
Download and install Plex – Awesome media center app, this is the base software for your Mac Mini media center and runs on top of Mac OS X.
Download and install Perian – A package full of all the codecs you’ll need to play various video formats.
Download and install Handbrake – Rip DVDs to your Mac hard drive in an array of different file types, store them on the Mini for easy access within Plex.
Video Cables
Depending on which Mac Mini you have and what TV you have, you will need a different cable. Remember the 2010 Mac Mini only needs an HDMI Cable . Here are an assortment of cables you may need, verify which is necessary for your mini model:
Mini DisplayPort to DVI
Mini-DVI -> HDMI
Mini-DVI -> DVI
HDMI Cable
DVI -> HDMI
MiniDVI -> VGA
Audio Cables
Some of the newer Mac Minis have optical audio out through the headphone jack. If yours is an older Mac Mini use the mini -> RCA (red/white) cable. The 2010 Mac Mini carries audio over HDMI, so no audio cable is necessary.
mini -> TosLink (Optical Audio)
mini -> RCA
Control the Mac Mini Media Center Wirelessly
To access and control the Mac Mini from your couch (or anywhere wirelessly), you’ll need:
Once your Mac Mini is hooked up to your TV (through HDMI or otherwise), sync the wireless keyboard and mouse to the machine. You’ll be able to use it as a large external monitor and then browse the web, play games, and use it as any regular Mac. This ability alone is totally awesome and well worth getting a mini for. If you wanted to you could stop here and just use things like Hulu to watch streaming video on your media center mini, but you’re this far you might as well go all out!
Controlling the Media Center with your iPhone
Snatch. Awesome app that allows you to use your phone as a trackpad, as well as a remote control for Plex. This article shows you how to make a custom remote screen with a decently attractive theme. Very sweet.
Air Video. Allows you to stream movies from your Mac Mini to your iPhone, works over 3G (albeit very slowly)!
Setting up the Server
I highly, highly recommend a very strong password on your Mac Mini.
To use the Mac Mini as a web server you’ll need a few things. First, you’ll need to be able to reach the Mini from outside your network. I accomplished this by getting a free account at DynDNS. You can pick from a few free domains, most of them pretty terrible. You’ll then need to download and install their free IP updater client. This small app runs in the background and updates your dynamic IP to DynDNS. This way, when you type in your chosen domain name, your DynDNS account will always know to send the request to the correct IP and get the Mac Mini.
Download and install XAMPP. Very nice web server stack that installs and runs very smoothly.
By default, Apache listens on port 80. Most ISPs block traffic on port 80 (mine did), so you can make Apache listen to a different port by editing your httpd.conf file:
* Open Terminal, at the prompt type:
sudo vim /Applications/XAMPP/xamppfiles/etc/httpd.conf
* Type your password and you’ll be editing the httpd.conf file in vim. It looks a little scary, but it’s just a command line based text editor.
* Press the down arrow until you come to a line that says, “Listen 80.”
* Press the letter “I” to enter edit mode, now change “Listen 80″ to “Listen 8080.” Press Esc to exit insert mode.
* While holding Shift, press Z twice to save and exit.
(Note: you can use nano/pico or another command line text editor if you are more comfortable)
There, now Apache is listening on port 8080 and most ISPs will be none the wiser.
Open the XAMPP Control app (in your applications folder / XAMPP) and start all your services. You can quit this app once you’ve started the services, they don’t stop unless you re-open XAMPP Control and stop them manually. Now go to a browser and enter the following URL: http://localhost:8080 – That website is being served from the Mac Mini!
Setup Remote Torrents
Download and install Transmission or uTorrent whichever you prefer, although we’ll use Transmission in this guide.
In the preferences for Transmission select the “Remote” tab. Check the box for “Enable remote access.” After you read the next point (Router Settings & Port Forwarding) and activate port forwarding you’ll be able to reach this web interface from anywhere in the world by entering the URL http://your.domain.com:9091 – Neat, huh? I’ve used this feature waaay more than I thought I would considering I’m out of my house all the time with my Macbook Pro. I simply download the torrent to my MBP, then upload it to my Mac Mini to do all the heavy lifting. Torrents are ready to go by the time I get home!
Router Settings & Port Forwarding
If you’re like me, you have a few different machines all getting their internet from a wireless router. I have a Linksys WRT54GL running Tomato Firmware. In order for the router to know which computer to send requests to, you’ll need to specify a few port-forwarding rules. You’ll need to get the local IP of your Mac Mini from your router device list. My Mac Mini happened to be 192.168.1.145. So in my router settings I set up the following rules under the port-forwarding settings:
Port: 5900 - Label: VNC - Forward to: 192.168.1.145

Port: 8080 - Label: Web Server - Forward to: 192.168.1.145

Port: 9091 - Label: Torrents - Forward to: 192.168.1.145
Shortening Ugly URLs
If you happen to own your own domain name you can avoid having to type in those ugly URLs (blah.dyndns.net) by using 301 redirects. Simply open or create an .htaccess file on your web host’s server that says:
redirect 301 /home http://name.domain.com:8080

redirect 301 /torrent http://name.domain.com:9091
Now when you type in yourdomain.com/home you’ll be redirected to your Mac Mini and the same for yourdomain.com/torrent! Handy.
Sharing Preferences
Open System Preferences and click “Sharing.” You’ll see plenty of options, mine look like this. You should do the same if you want the capabilities listed here.
Screen Sharing
Now that all that’s set up you should be able to access your Mac Mini’s desktop from anywhere in the world. Just activate Finder and, in the menu bar, click Go > Connect to Server. Type in:
vnc://your.domain.com
You should be able to type in your user/pass and, voila, you’re at your Mac Mini’s desktop.
Note: VNC is unencrypted traffic by default and you should tunnel through SSH if you’re concerned about security. You can see a guide to setup secure screen sharing in OS X here.
–––––
That’s about all I’ve got for now. Please let me know if I’m missing anything and feel free to add your input!
This should make for a pretty nice little Mac Mini that lets you:
* Add/Edit/Delete active torrents without being anywhere near your house
* Watch movies & TV shows, listen to music, view photos, and view weather from your couch
* Control your media center with an iPhone
* Create/edit websites on your Mac Mini and access those sites from the web
* View your videos on your iPhone while in other rooms of your house or apartment
Enjoy!

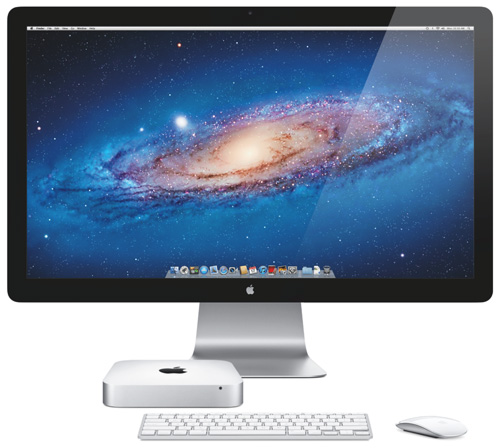

 works wonderfully and looks great on a coffee table
 is perfect